Test your microphone online
How to test your microphone online?
- Click on the "Start" button.
- Allow access to your microphone
- Start to speak or do some noise near you microphone
- If everything is ok you will hear and see the perceived sound by your microphone
Test My Microphone is a simple and easy to use web application that helps to test your microphone. It can be very useful when you purchase a new device and there is no software on it to launch the microphone.
Error message's:
Permission denied by client
When you press the start button on Test My Microphone, it will try to activate your microphone. To do so the browser will ask for your permission. “https://testmymicrophone.com/ wants to use your microphone” notification will appear and you can choose to allow or deny the permission. If you allow Test My Microphone to accesss your microphone, you will hear in your speakers or earphones (if you have speaker or earphone connected) what your microphone hears and the perceived sound is visualized also. If you deny the permission then a “permission denied by client” message will appear above the start button.
An unknown error has occurred
When you hit the start button and your browser asks your permission to activate the microphone and you don’t press the allow or deny button, just close the notification bar, than the “An unknown error has occurred” message will appear above the start button.
Why I don't see the "Start" button?
If you don\'t see the button it means you don\'t have microphone or it is not installed yet!
What to do to stop the test?
Press the "Stop" button and the microphone will stop the listening.
In this guide, we will talk about one of the biggest issues in Windows 10: the microphone issue.
In general, Windows 10 doesn’t work easily with many recording devices, even if they’re built in to the computer. What we’ve found through our experience is that if a mic connected to a computer isn’t working it’s usually a settings problem, and not a problem with the microphone itself.
If you don’t have any problems just yet – you just have a new microphone and you are unsure how to install it – check out our microphone installation guide.
How To Fix Microphone On Windows 10
Fastest solution if after April 2018 update
First of all, if the problem started after April 2018 (a major Windows 10 update), then the fastest solution may be this:
Many computers had a kind of privacy settings reset after Microsoft’s April major update. This reset made your apps and programs not able to access your webcam and microphone. Therefore, we should give them their access / permission back… Follow me:
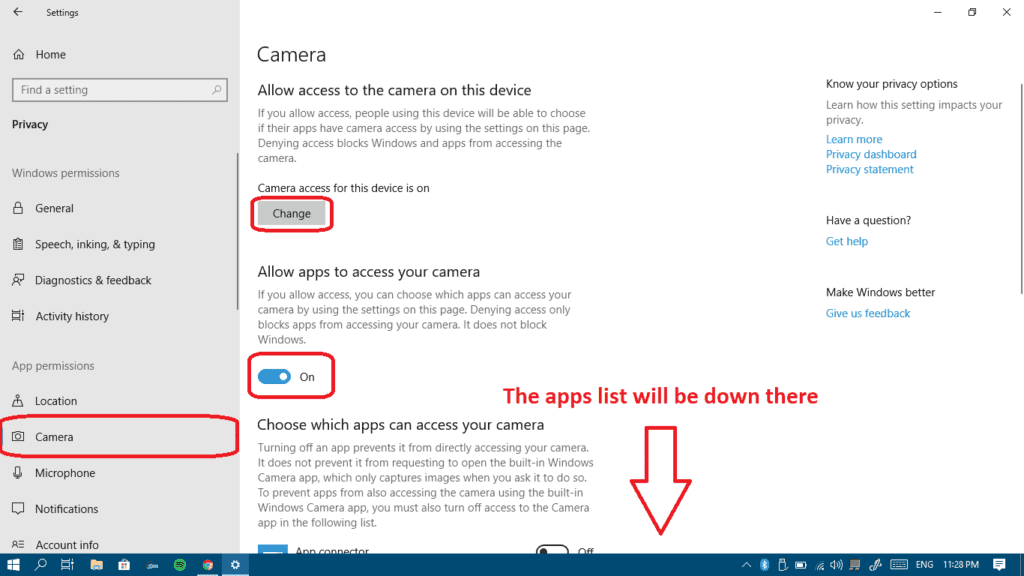
- Open Settings from your start menu.
 Click on Privacy in order to access all your privacy settings.
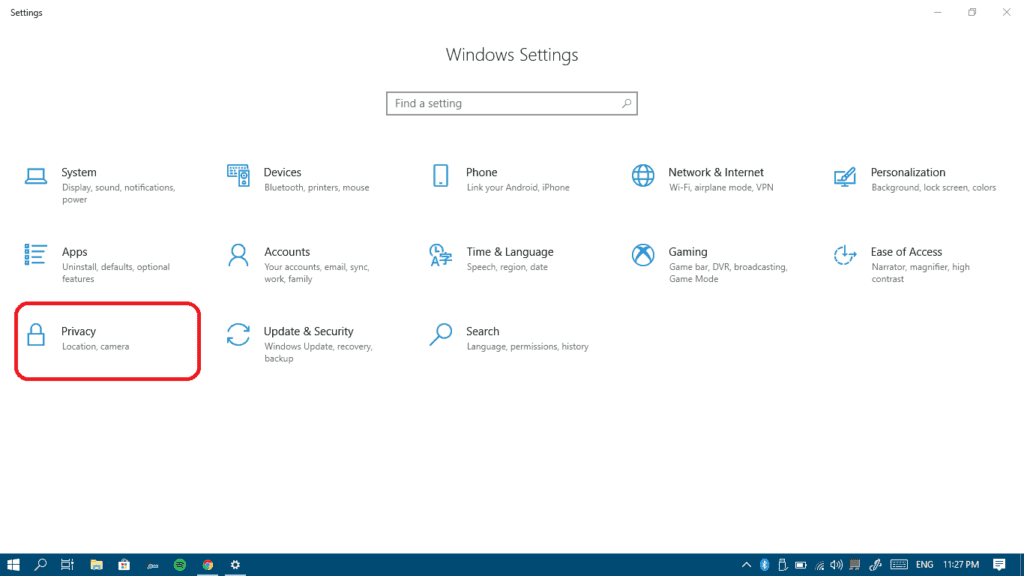
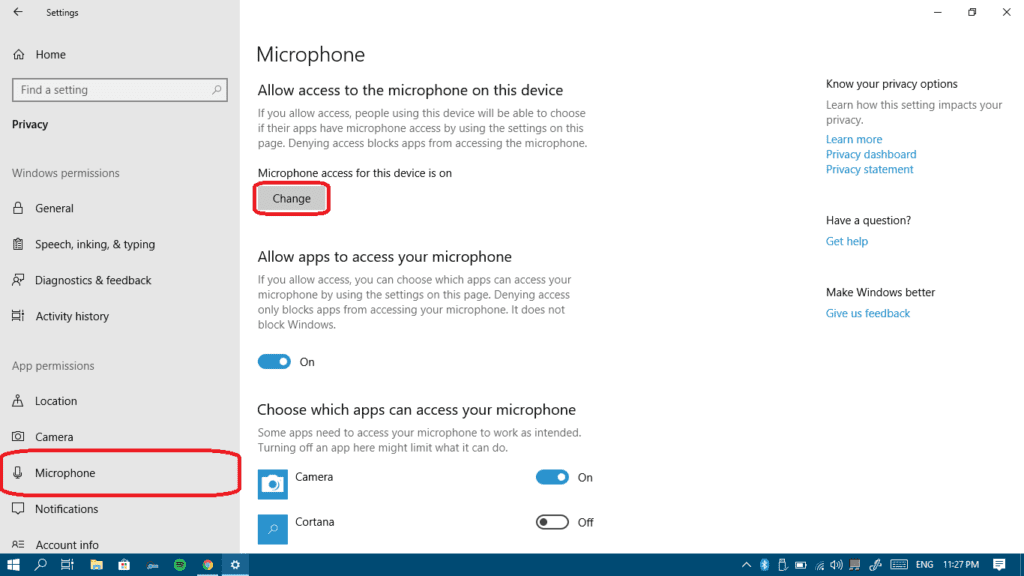
- Select Microphone from the left pane and then click the Change button.
- Now, turn on microphone for this device.

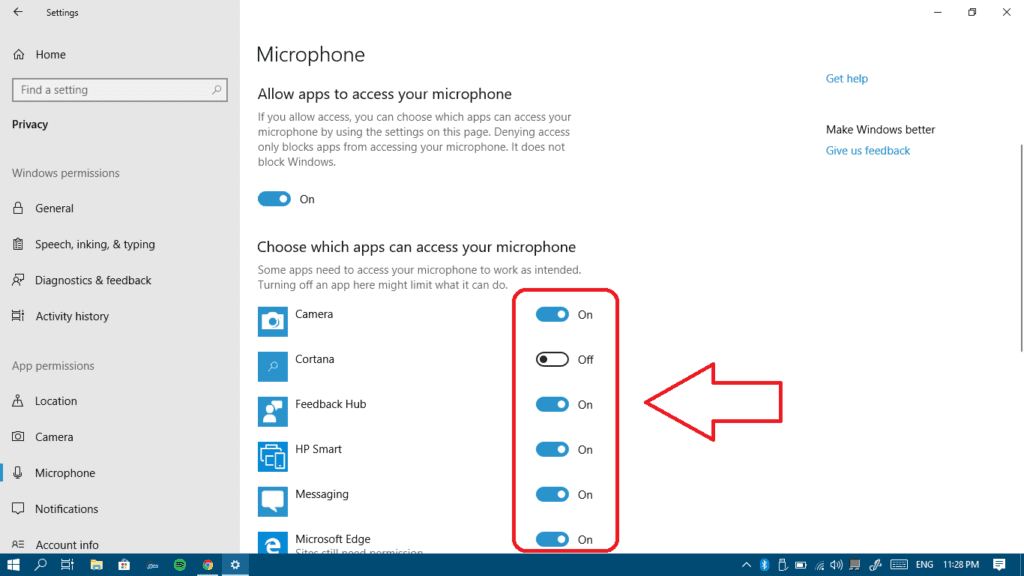
- Turn on Allow apps to access your microphone.
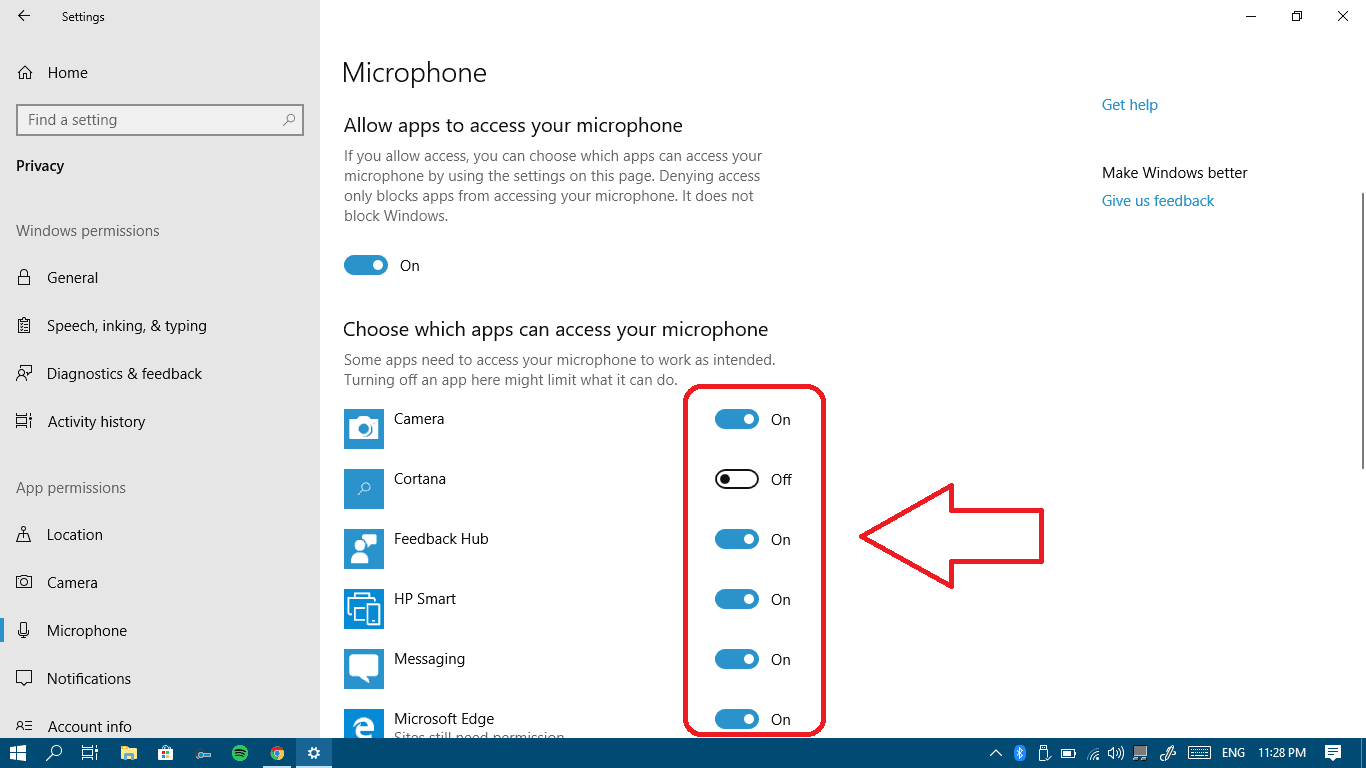
- Finally in the app list, make sure to turn on microphone access for every app you want to give permission to access your microphone.
- Repeat the same exact steps but for your webcam this time.


Your mic still isn’t working?
Make sure it’s not a hardware issue
Let’s check that your mic isn’t damaged or faulty first and get that out of the way. The best way to check that is to connect your microphone to another computer running any operating system other than Windows 10.
If the microphone doesn’t work on the other computer too, that means it could be faulty. If it does work on the other computer that means you probably have a software problem on your Windows 10 computer.
On both PCs, if you’re using a desktop computer (not a laptop), make sure you’re connecting your microphone or headset to the back panel of the PC. The front audio ports aren’t always well connected to the motherboard.
Now that we know that it is a software problem, let’s get it fixed.
If you know your recording device is called “VIA HD audio” please click here
If you know your recording device is called “IDT High Definition Audio Codec” please click here
If the problem concerns your gaming headset, or other microphone + headphones combo, check this out
If you have installed any video/audio recording software on your computer – check this
If none of these links above are relevant to you, keep reading.
Method I: Let’s fix some recording device settings
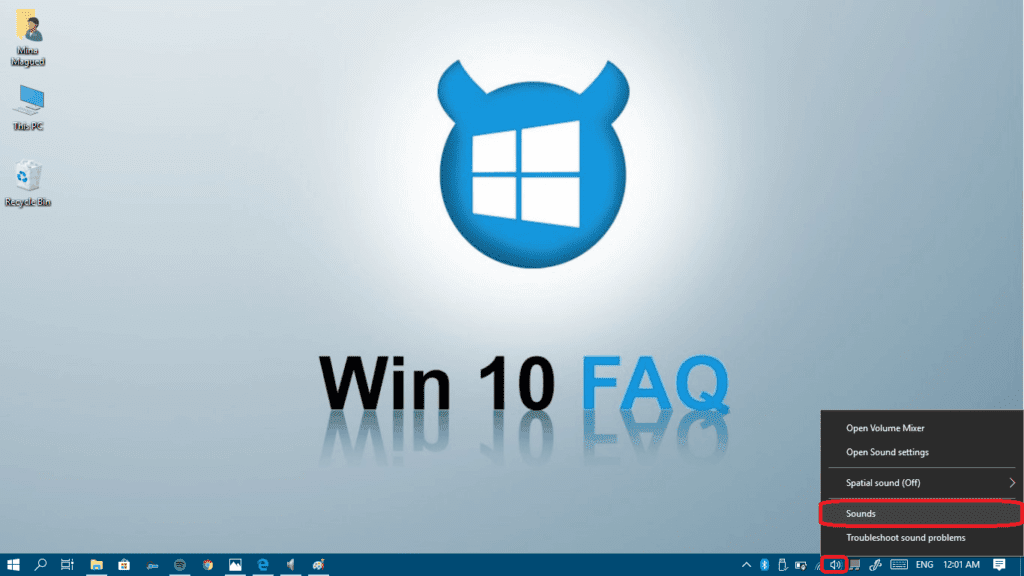
- Right-click on the speaker icon in the bottom-right part of the screen and choose Sounds.
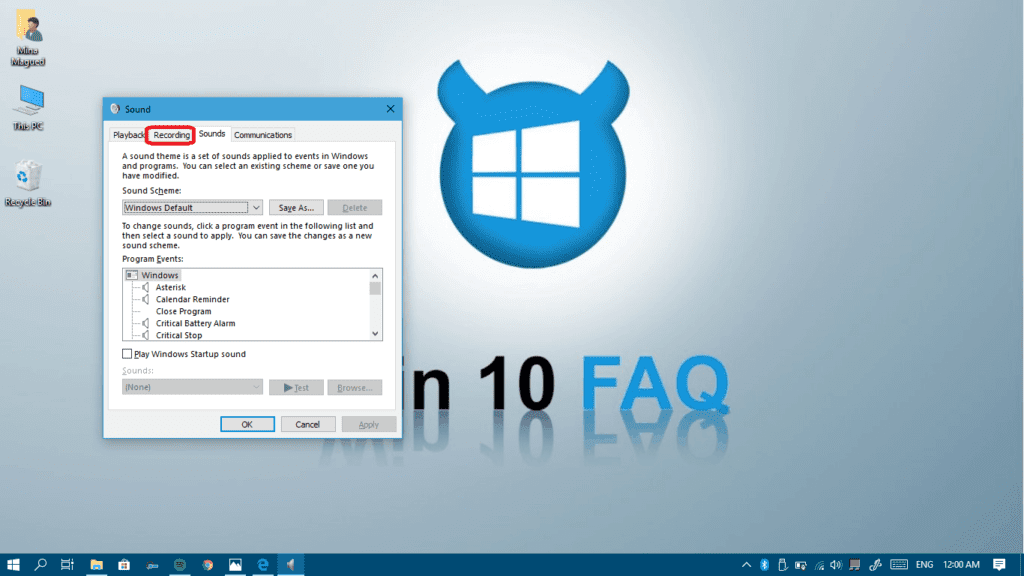
- Click on the Recording tab in order to see your recording devices list.
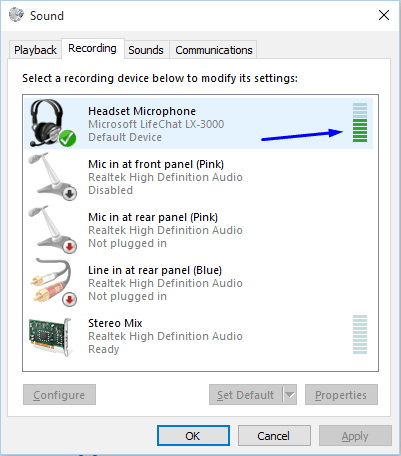
- A list of recording devices will appear. Try speaking into your microphone, and see if there any green bars rising next to one of them while you talk (as in screenshot).
- If you don’t see any green bars skip to step 5. If you do see green bars when you talk into the microphone, but it still doesn’t work in some program, then that means that the mic is correctly configured in Windows, but the program is listening to the wrong recording device. Try changing that program’s settings.
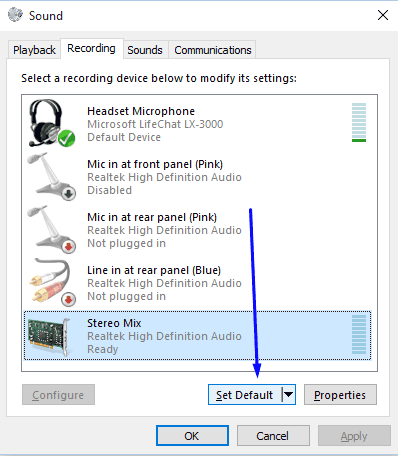
- Check if you can recognize which one of the devices in the list is your microphone. If you found it, click on it to highlight it, and then click Set Default.


- Check again if you see green bars rising when you talk into the microphone. If you do your mic is now correctly setup. If not, continue to next step.
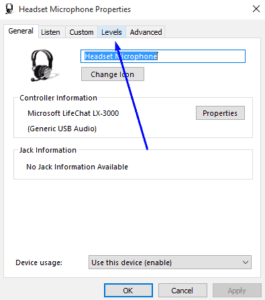
- Double-click on the device that represents your microphone. The Microphone Properties window will appear. Click the Levels tab.
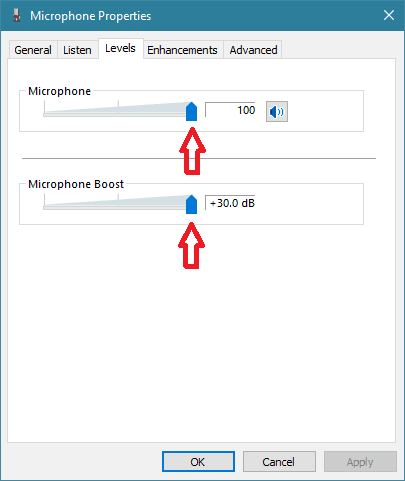
- In the “Levels” tab make sure that “Microphone” and “Microphone Boost” are set to the maximum, you can do that by sliding them to the right until the first one shows 100 and the boost is set to +30.0 dB. Then click OK.
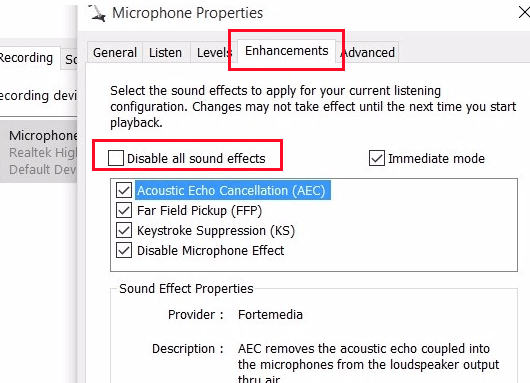
- In the “Enhancements” tab (if found), make sure to uncheck the “Disable all sound effects” checkbox.
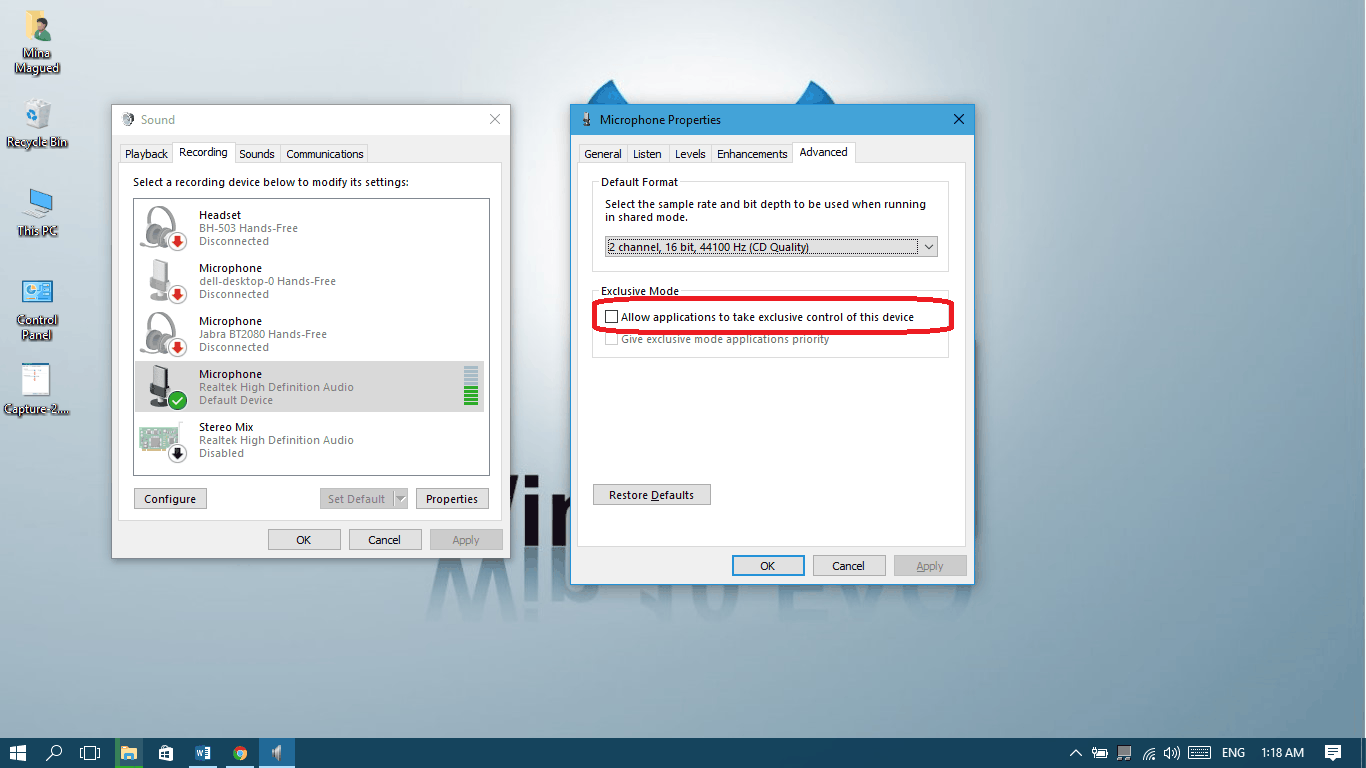
- Now visit the “Advanced” tab too and make sure to uncheck the “Allow applications to take exclusive control of this device” checkbox and click “OK“. (Also uncheck the “Enable audio enhancements” check box if found).

- In the main recording devices panel, go to the “Communications” tab and select the “Do nothing” radio button and then click OK.

- Restart your computer and recheck your recording devices panel. If you see green bars rising when you talk into the microphone – your mic is now properly configured!
- If you still don’t see any bars and you’re not 100% sure which one of the devices is the relevant one, try following steps 4-11 for every device on the list.
Method II: Uninstall and reinstall your microphone drivers
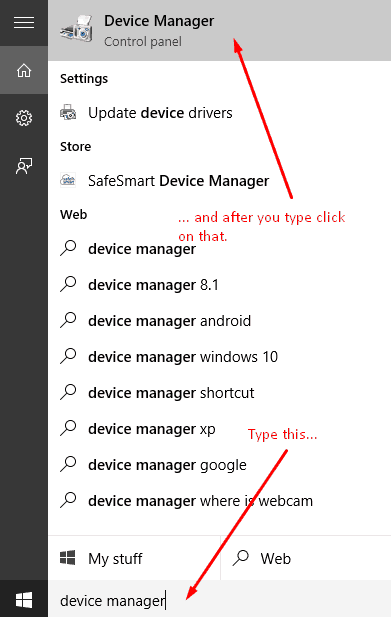
- Open device manager, fastest way is through the search bar:
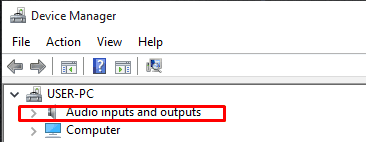
- Open ‘Audio Inputs and Outputs’
- Left-click on your recording device.
- In the menu that opens up Click ‘Uninstall’.
- Physically disconnect your microphone from the computer.
- Restart the computer.
- Reconnect microphone and let Windows re-install the drivers.
- If your Windows 10 updating gets stuck, this may prevent you from getting the latest drivers automatically. Check this guide to fix it.
- If it didn’t work, I would suggest that you install the latest driver found on your computer manufacturer’s website manually, because sometimes the latest driver isn’t the one compatible with your computer. So you should search for your computer model number on the manufacturer’s website, download the latest driver that is compatible with your model number and Windows 10 and check if it works.
- If you found your computer model on the website but can’t see a version for Windows 10 there, this means there aren’t compatible drivers for it yet and you may have to wait until they release some new drivers.
- Next up are solutions only to specific devices, so if you read up to here and nothing worked, please head to our forum and we’ll try to help.
Method III: Specific solution for users with IDT High Definition Audio Codec device
- Open device manager, fastest way is through the search bar:
- Open ‘Audio Inputs and Outputs’
- Double click on your recording device ‘High Definition Audio Codec’.
- Move to the ‘Driver’ tab.

- Click ‘Update Driver’.
- Click ‘Browse my computer for driver software’.
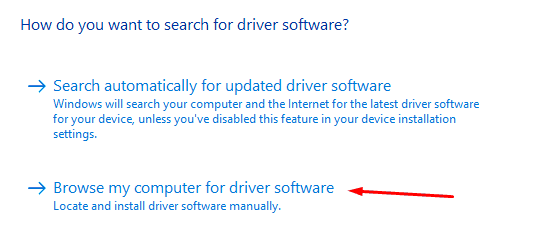
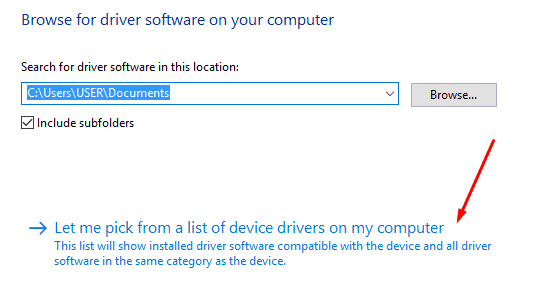
- Click ‘Let me pickup a list of device drivers on my computer’.
- Select ‘High Definition Audio Device’, and not ‘IDT High Def’, and click Next.
- You will get a warning. Click “Yes”.
- Check if it works.
Method IV: Specific solution for users with VIA HD Audio device
Many VIA users are experiencing problems with recording and/or playback since they moved to Windows 10. If you’re one of these people try to download and install Daniel_K’s modified drivers.
Method V: If the problem concerns your gaming headset or microphone + headphone combo:
First of all, make sure the connection type between your headset and your computer is the same. If your headset has 2 independent jacks, one for the audio and the other for the microphone, your computer must have independent ports as well. If it’s a 2 in 1 (one jack for both microphone and audio) then you computer must have one single port with a headset icon on it.
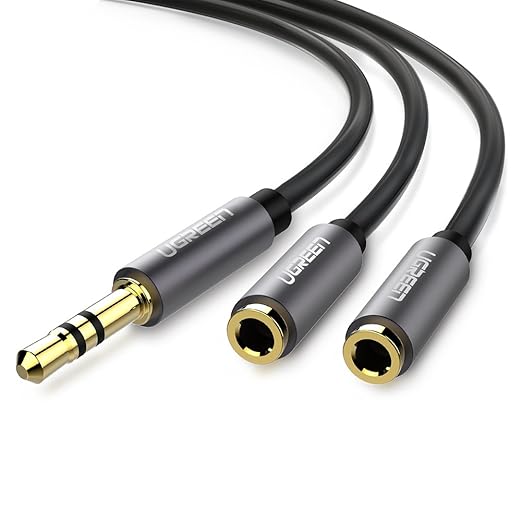
- iPhone earphones and other headsets’ microphones with one single jack won’t work in case your computer has two ports, splitted. So you’ll need to buy one of these splitters:

- If your headset has two independent jacks and you want to connect both of them to the one headset port in your computer you will need one of these splitters:
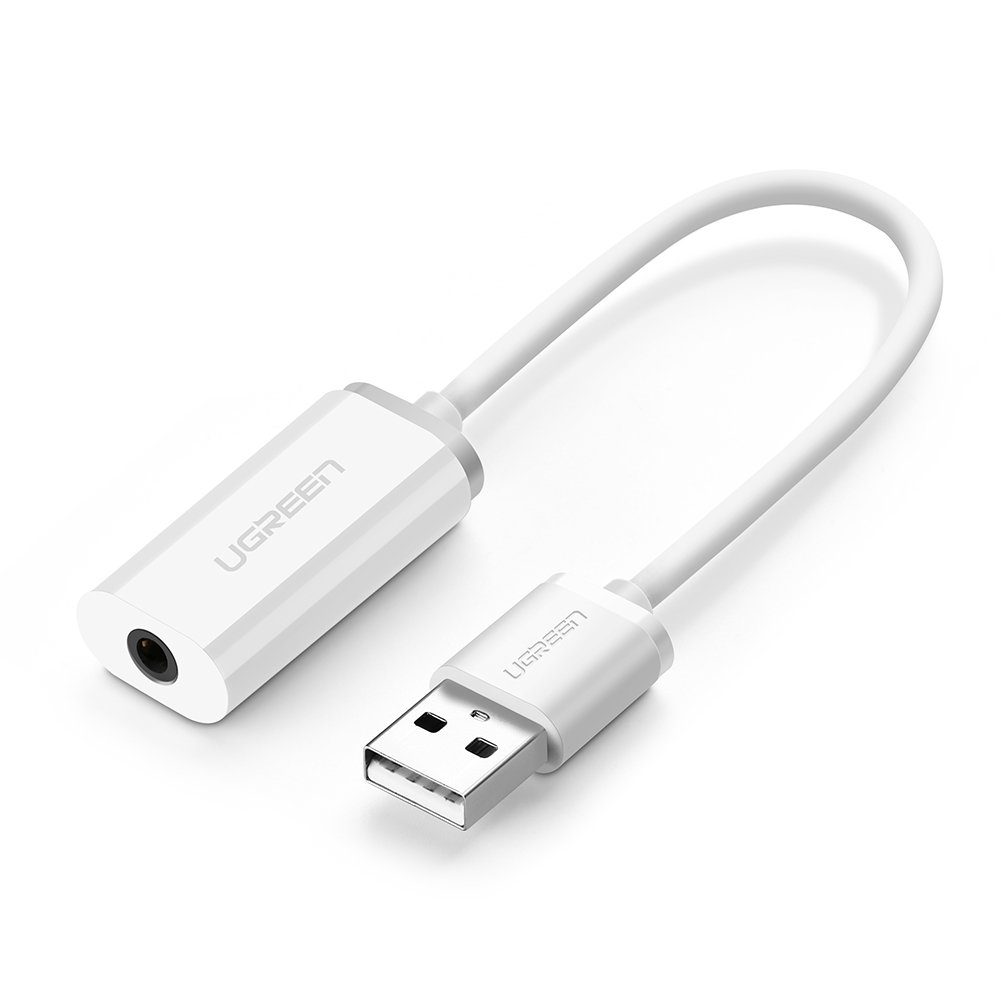
- If your connection is the same on the headset and in the computer, but the microphone still doesn’t work, you may try to convert to USB connection, use one of these converters:
- For 2 x 3.5mm jacks headsets

- For 1 x 3.5mm jack headsets
- For 2 x 3.5mm jacks headsets
- Uninstall any VoIP programs and applications, like Skype, Teamspeak or any other voice calling programs, then restart your computer and if your microphone works again now you can reinstall them.
Method VI: If you are using recording software
People who use recording software (Audio recording / screen recording) have to check that your software is up-to-date, some people reported that an old version of flashback express screen recorder was muting their microphones.
Hopefully, using these methods helped you fix the microphone settings on your Windows 10. If not, keep reading!
Please note:
If you still have problems after reading this article and going through the steps, please ask your question in our forum, where we have an expert on the subject that will try his best to help you. As we learn more information through the forum we update this article with advice that is tailored to specific devices.